Create Your Dropbox App
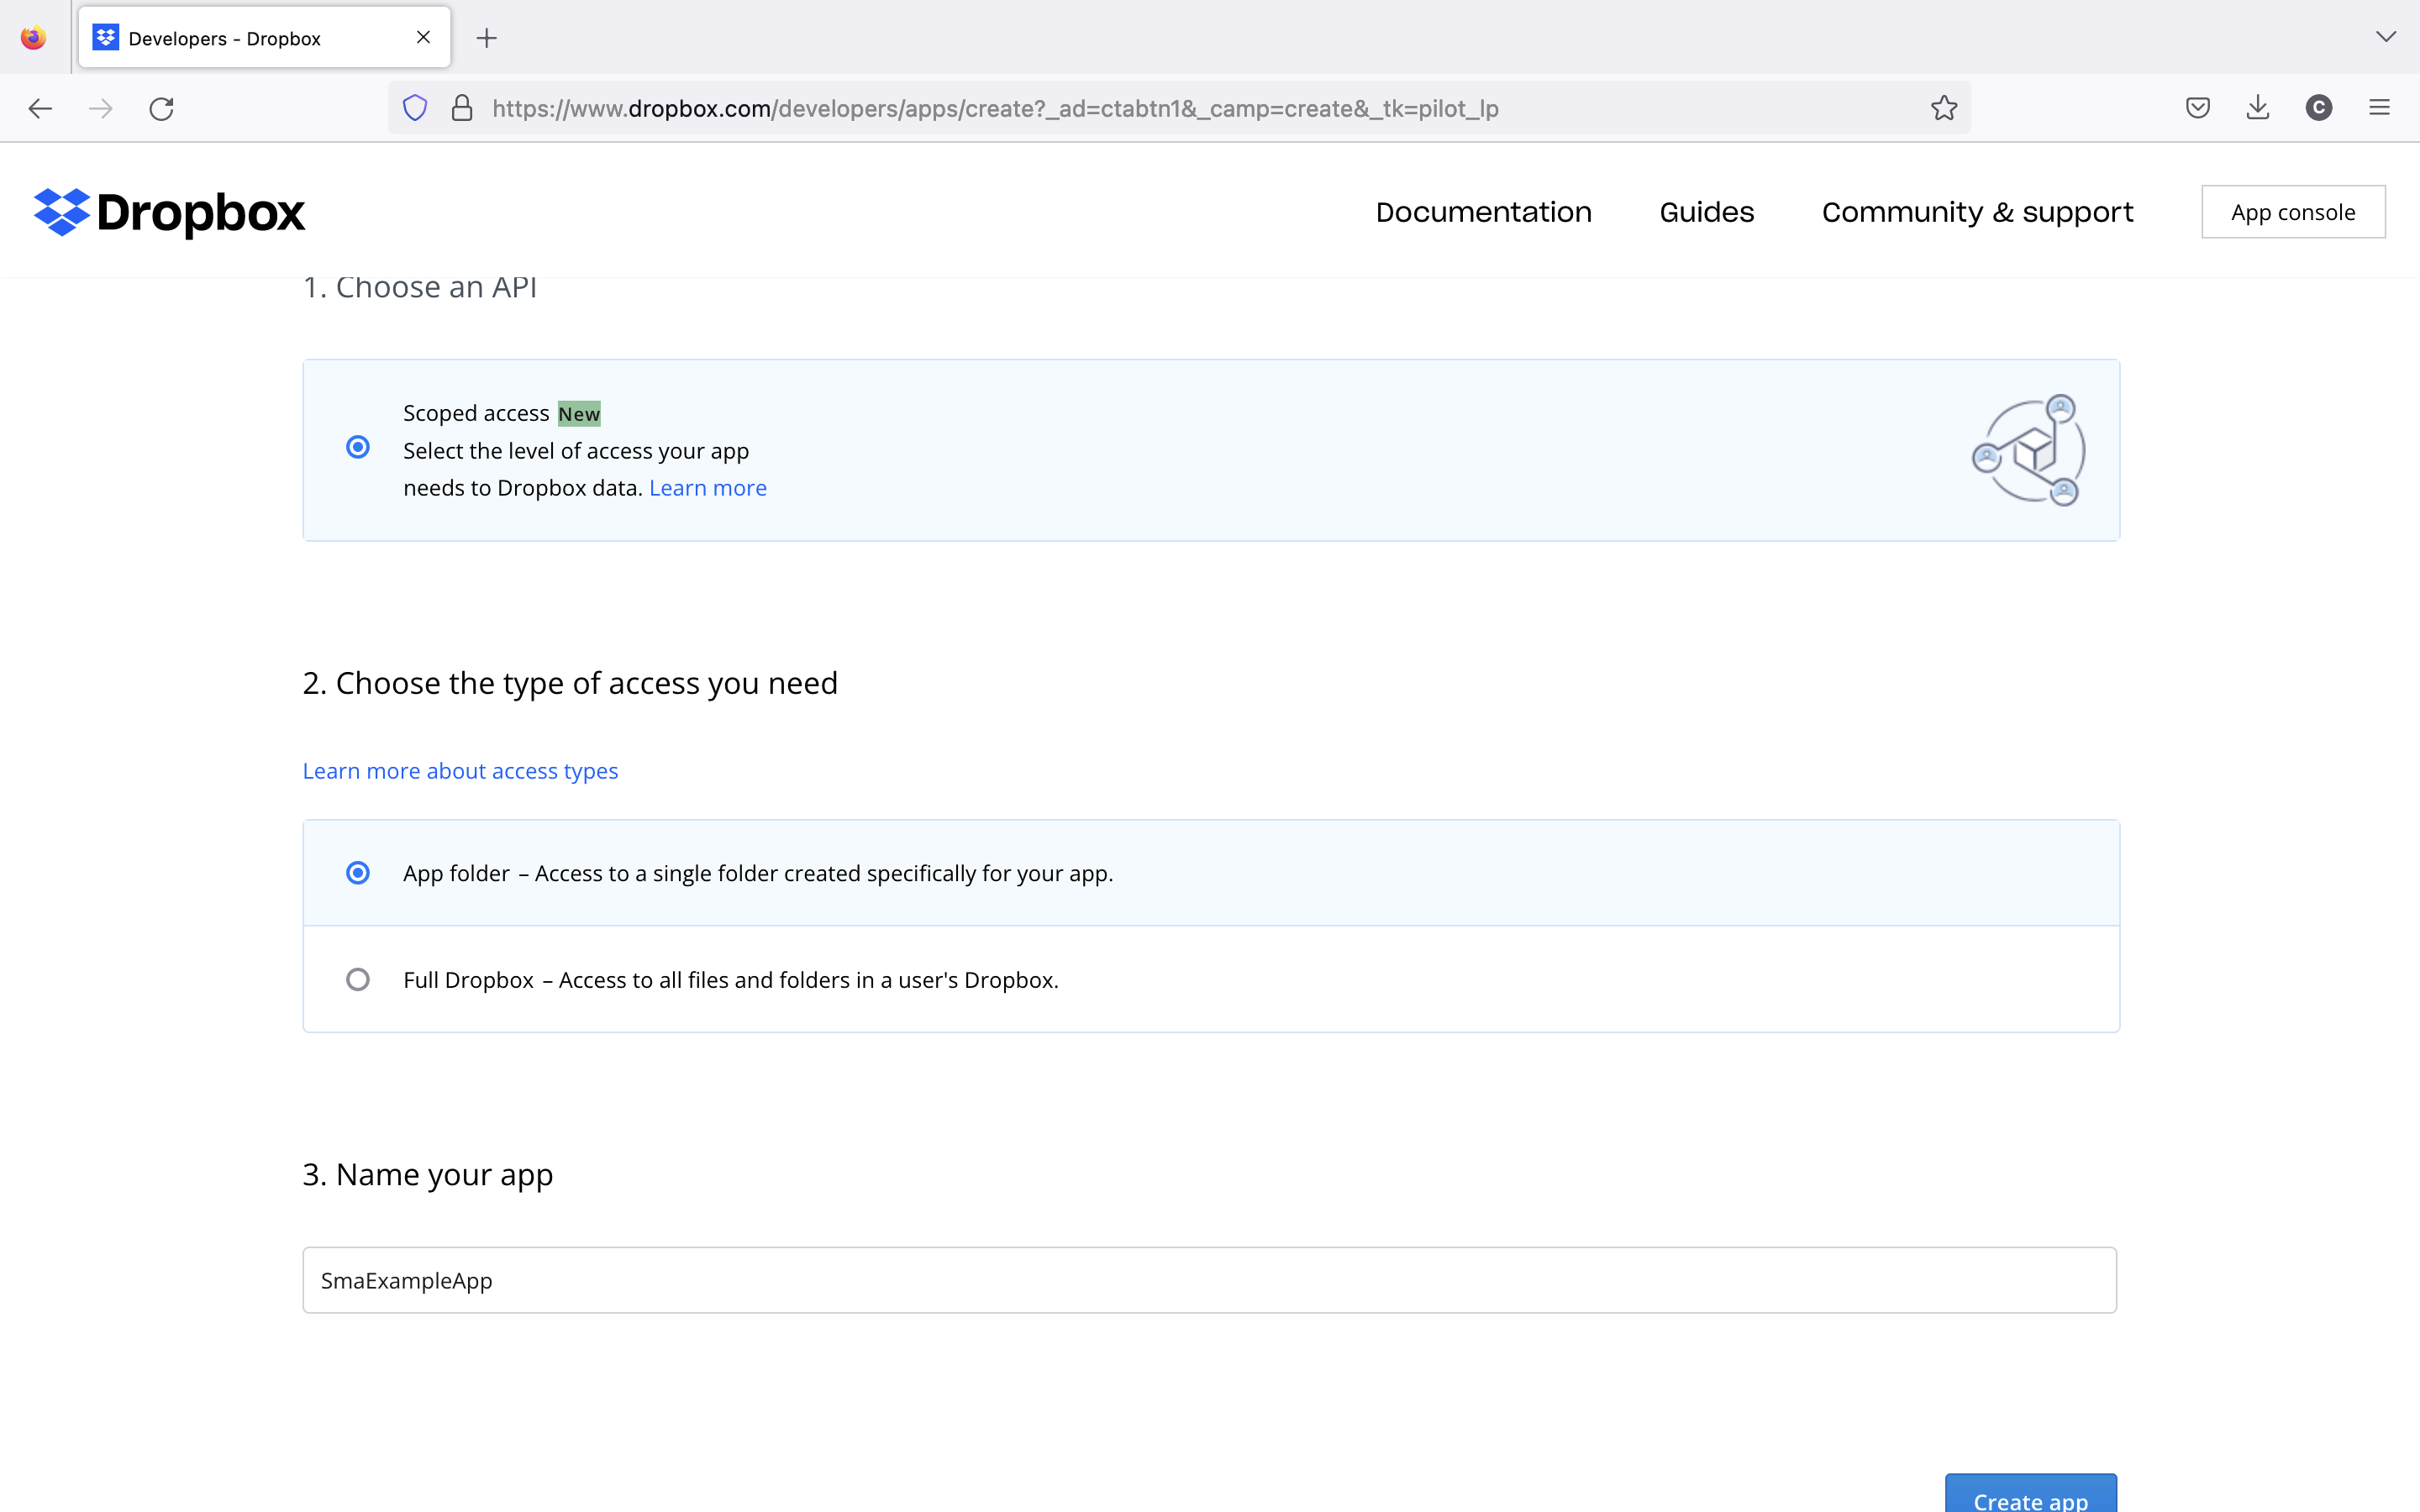
First, go to https://www.dropbox.com/developers/apps/create?_tk=pilot_lp&_ad=ctabtn1&_camp=create. Then select the “Scoped access” and “App folder” fields before choosing an app name.
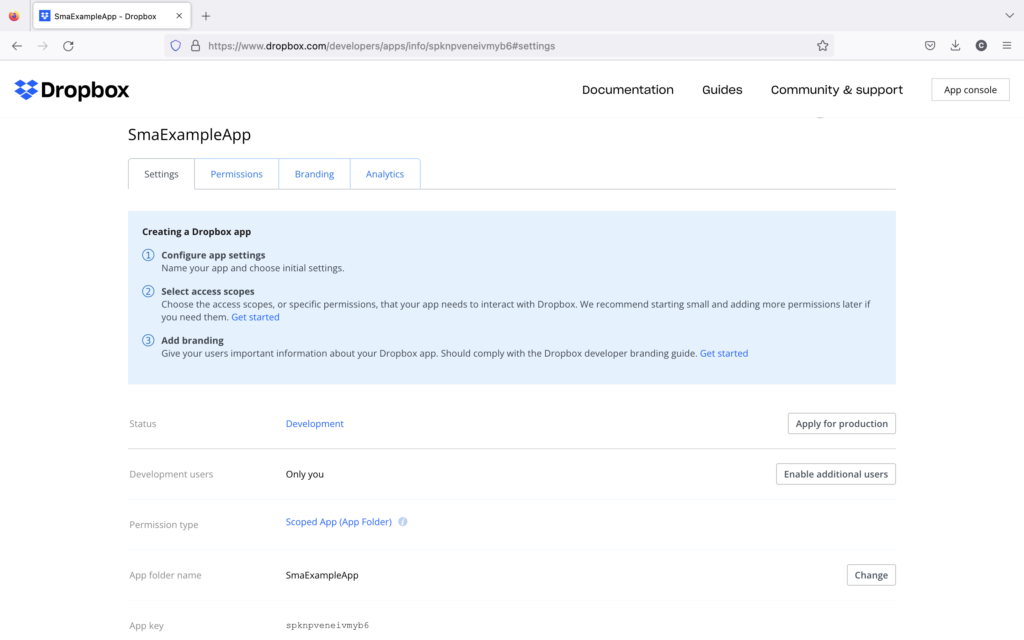
Once the app has been created, you should be taken to the App Console page, where you can manage the settings for your app.
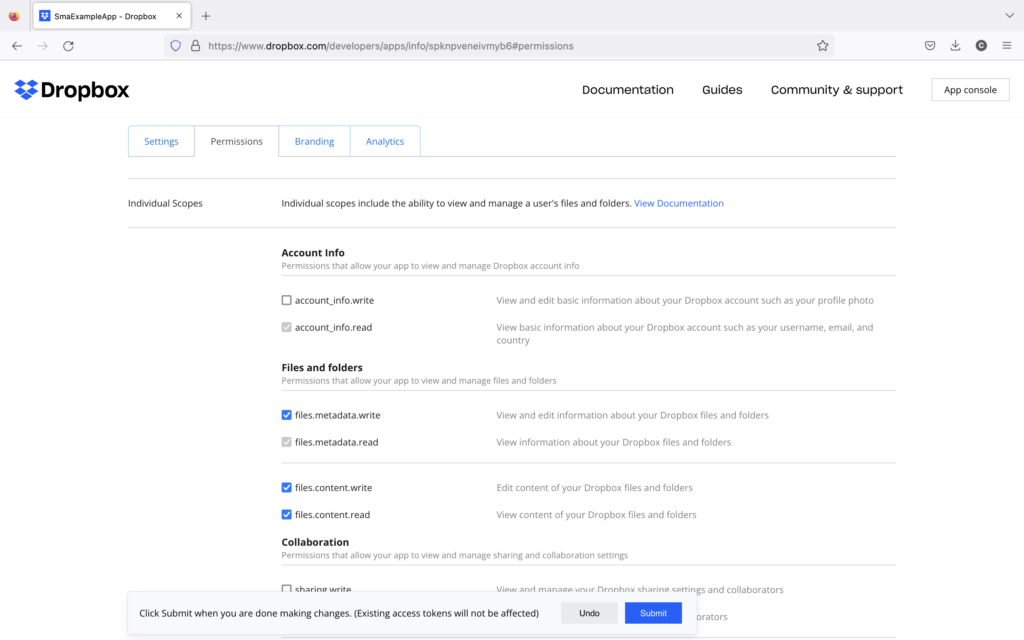
To make deliveries to your app from SMA, you’ll need to change some default permissions settings. First, click on the “Permissions” tab in the App Console, and make sure that “files.metadata.write,” “files.content.write,” and “files.content.read” in the “Files and folders” section are selected.
Then, in the same “Permissions” tab, scroll down to the “Connect” section and select the “openid” field.
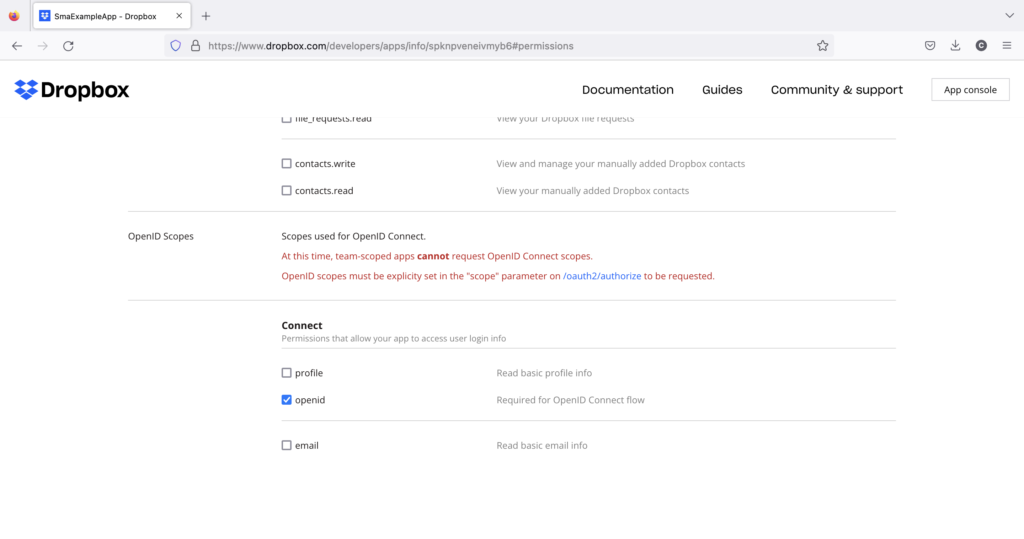
Once you’ve changed all the necessary permissions, click the Submit button at the bottom of the screen so that they’re saved.
Configurations that need to be made within SendMyAd
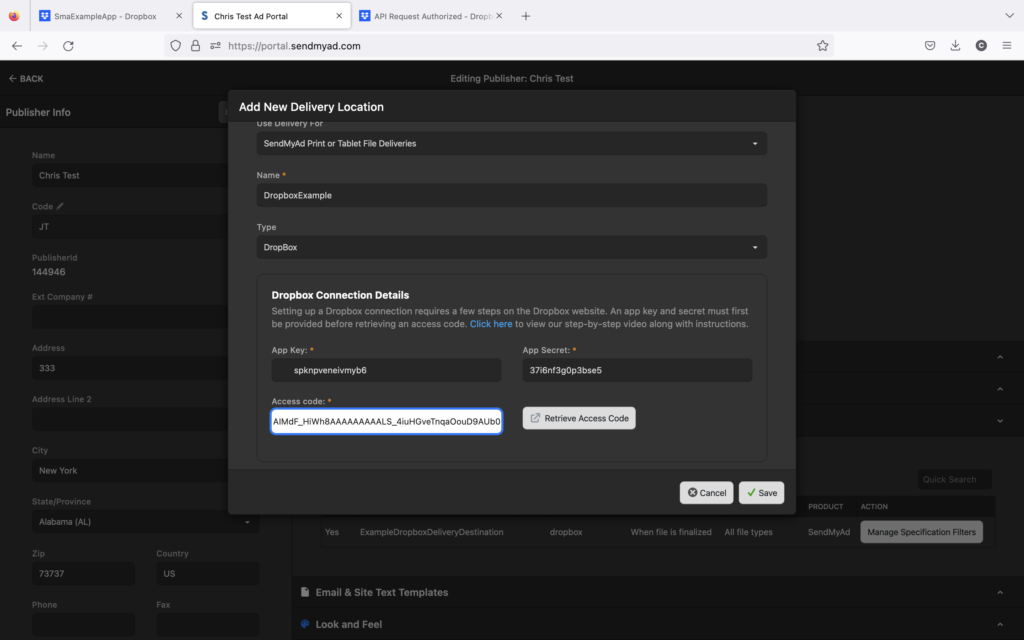
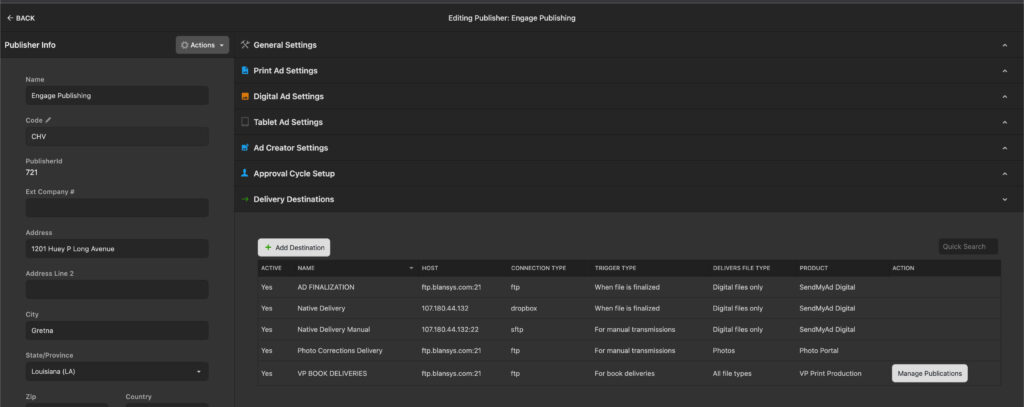
Navigate to your Company Profile -> Delivery Destinations panel and click the “Add Destination Button”.
For “Type”, choose “Dropbox”.
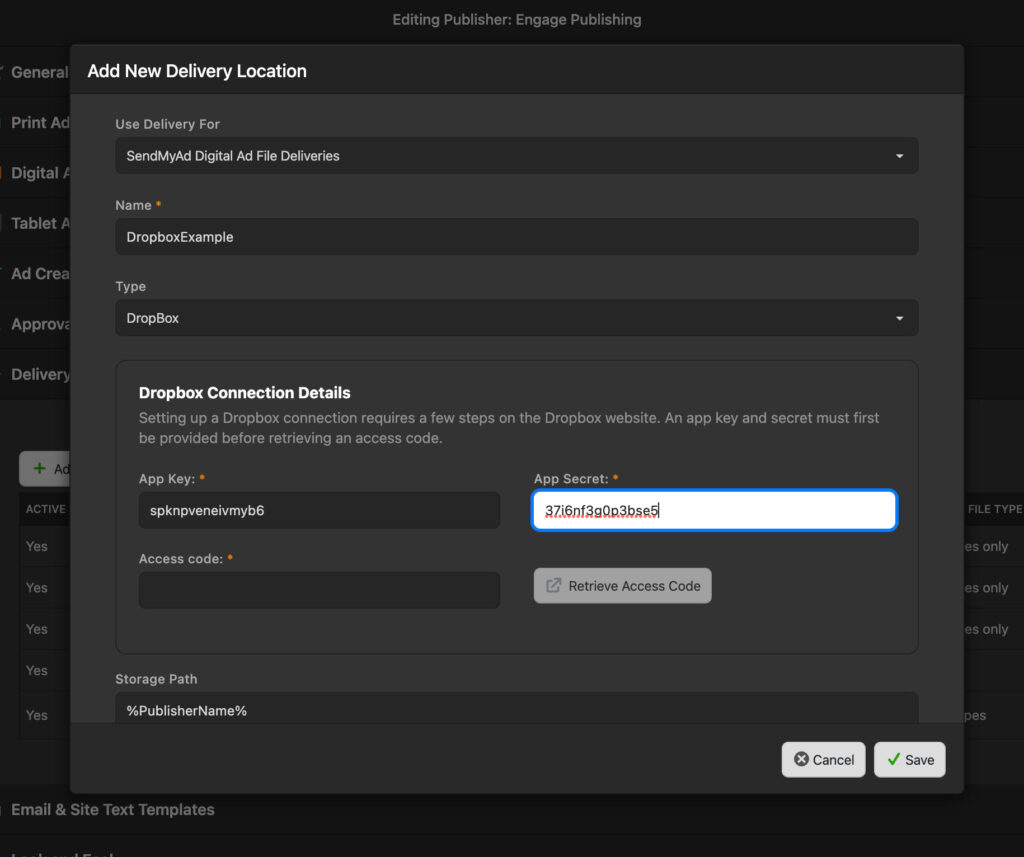
You’ll notice a new panel reveals itself, requesting an App Key, App Secret and Access Code.
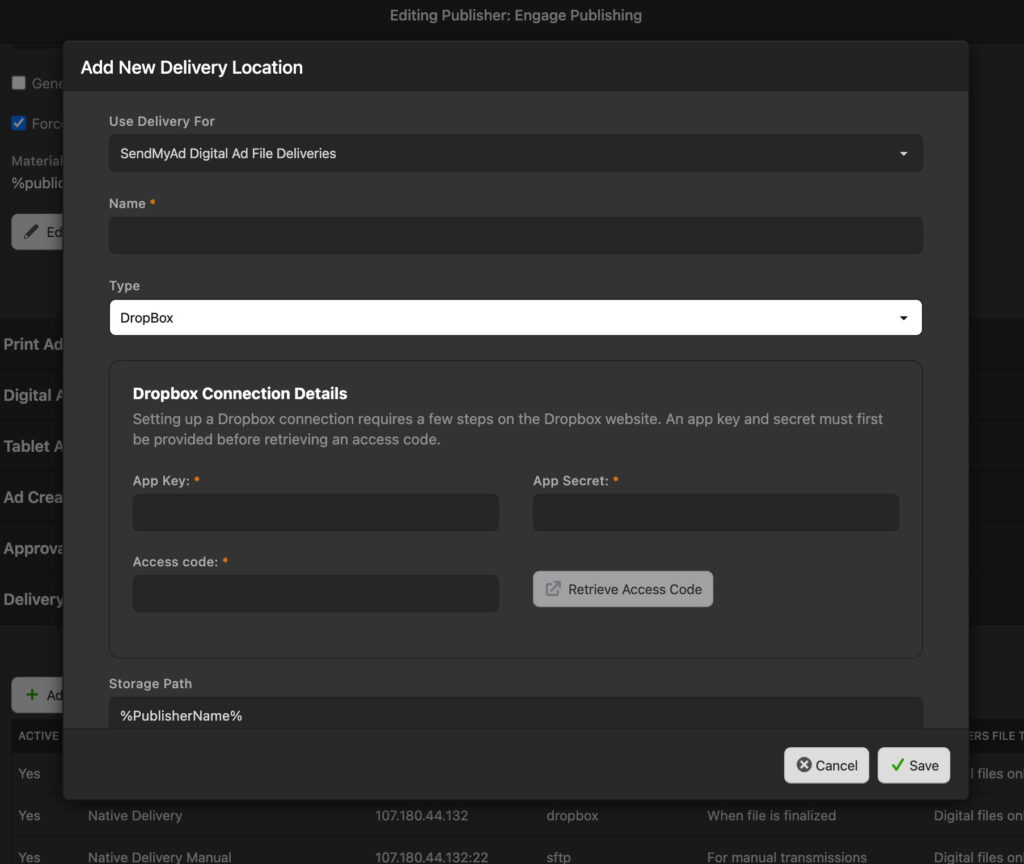
The App Key and App Secret can both be found in the “Settings” tab of the page for your Dropbox app found in the App Console.
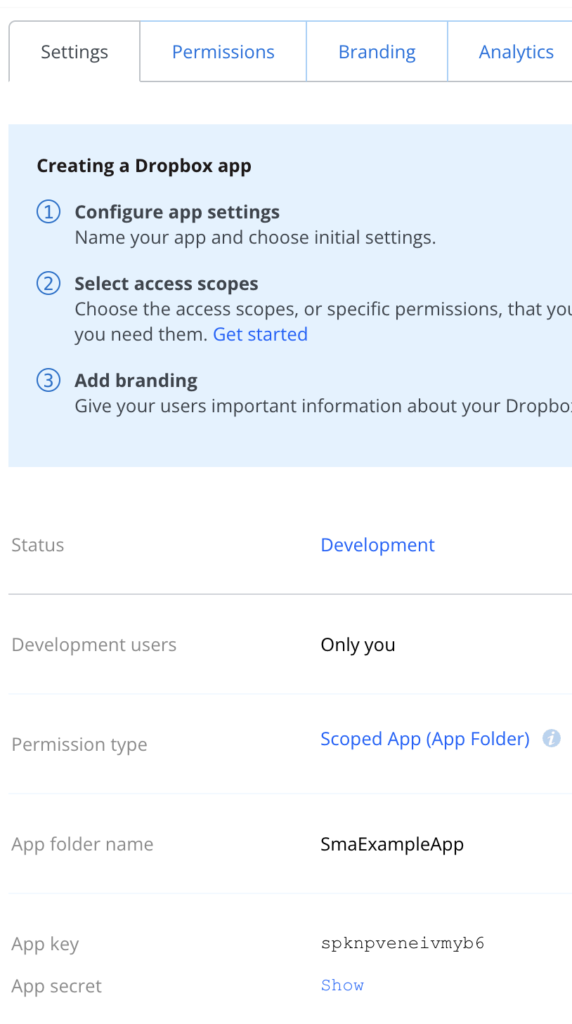
Copy and paste your App key and secret into the appropriate fields within SendMyAd, then click on the “Retrieve Access Code” button.
Doing this should open a new window or tab on a Dropbox Authentication website.
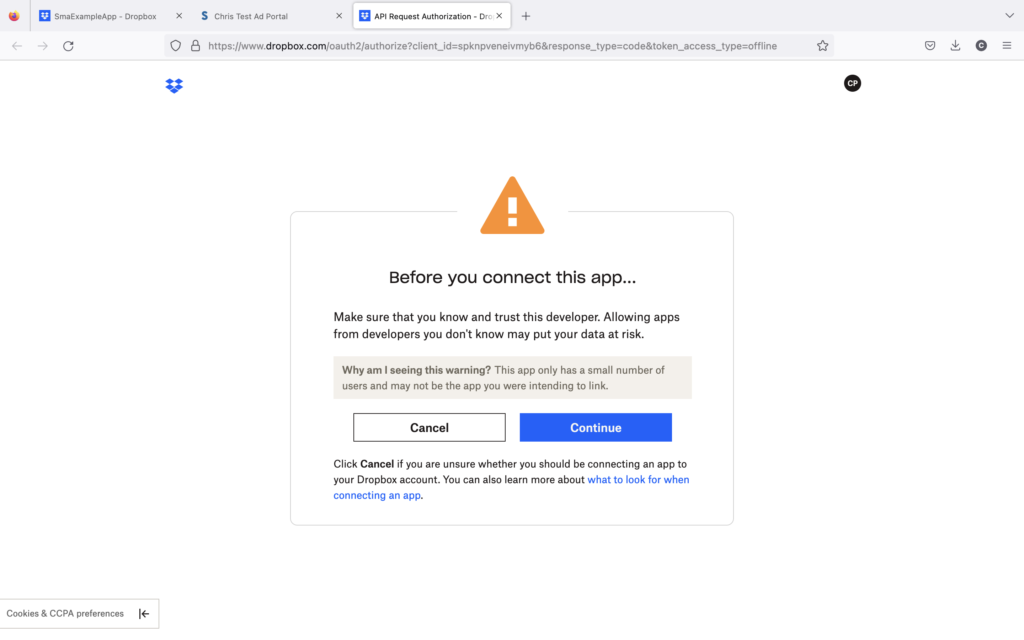
Click the “Continue” button to proceed.
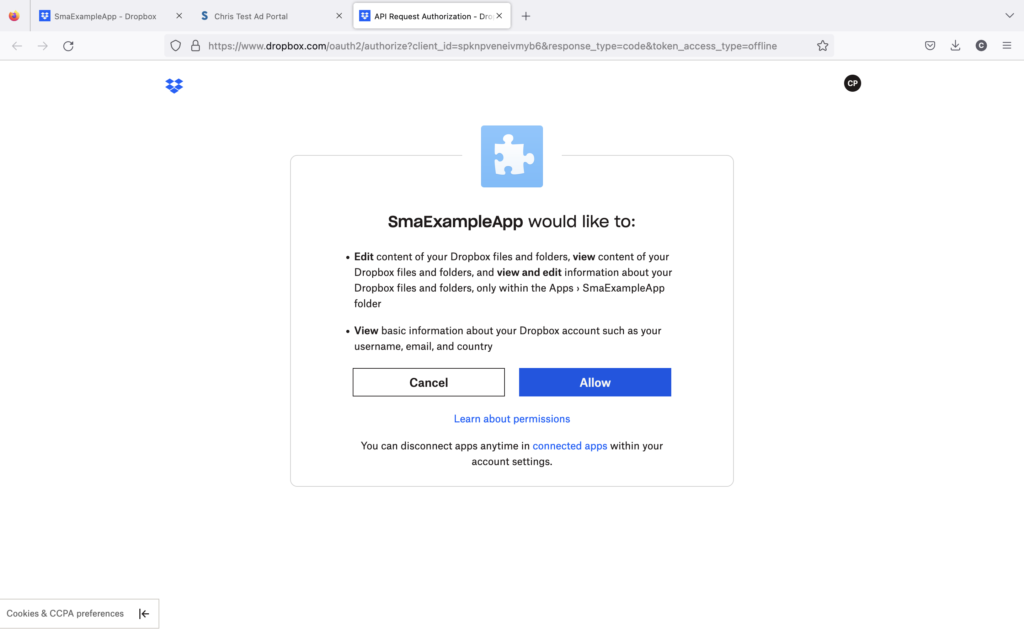
Click “Allow”. You should be taken to a page with a newly generated access code.
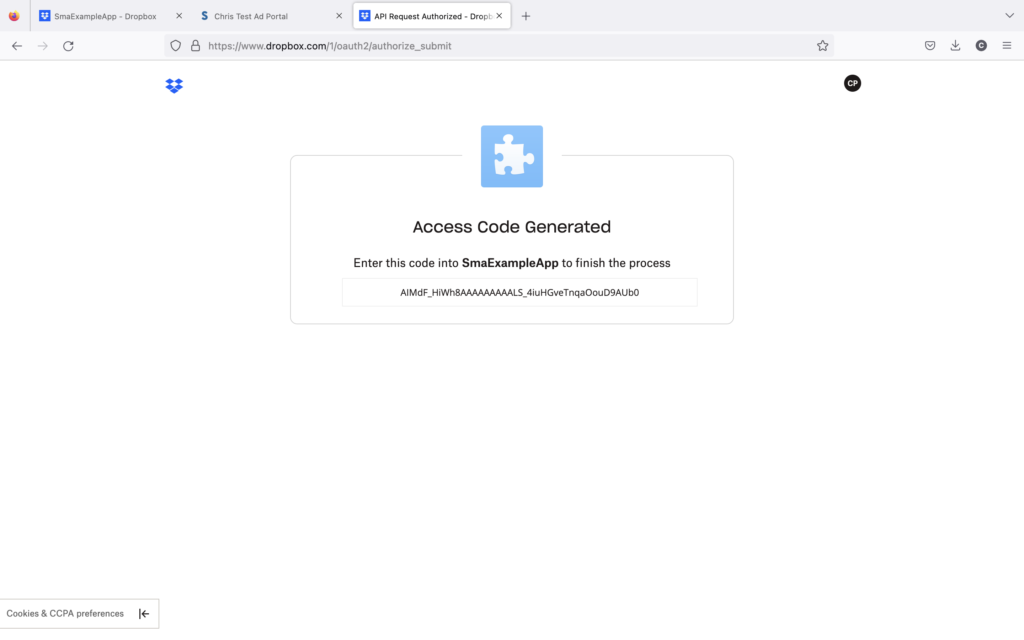
Copy that code into our “Access Code” field in the Delivery Destination setup window, and click “Save”.